Wednesday, December 24, 2014

Beware the Cam Caddie Scorpion EX

I just got a Cam Caddie Scorpion and tried it with my new Canon EOS 70D. The screw was thumb tightened. It worked ok and I was having fun with it shooting some test videos.

Then when I tried to unscrew it, I found it was extremely tight. I tried harder and only managed to spin the knob whilst the screw remained in the tripod socket.

Great. Well, I needed my camera free of the Cam Caddie, so I used a hacksaw to cut it off. But I still couldn't get the screw out.


Damnit. So I went to the local hardware store and bought a a beefy locking vise grip. It was extremely hard to turn, it was seized in there good. I tried harder and the screw broke off in the tripod socket. Fuck.


I called Nippon Photo Clinic and they quoted me around $100 to replace the bottom plate. Goddammit.

Lesson: DO NOT BUY OR USE A CAM CADDIE SCORPION. It looks like, feels like, and acts like a cheap piece of shit.


Monday, December 16, 2013

Converting MLV files to DNG on OSX

Enjoy this running french bulldog while you read the post below.
I previously posted about my experience with converting MLV files to RAW for post processing on a Mac. Well, shortly thereafter I got a bit of help and was able to figure out how to convert directly from MLV to DNG or cDNG. I hope this process helps to spur the adoption of MLV amongst Mac users.

Solution:

Thanks to the generosity of Danne and g3gg0 over on the Magic Lantern forum, I got the correct syntax to convert MLV files directly into DNG sequences without making an intermediate RAW file.

From this thread: http://www.magiclantern.fm/forum/index.php?topic=9573

Here is the syntax:

1. don't use spaces
2. first cd into a directory ("cd  <directory>" and note the SPACE after cd)
3. then execute "./mlv_dump --dng <filename>" (ENTER THE FILENAME MANUALLY WITHOUT ANY PATH)

And whaddaya know, it works beautifully! Now I just need to find a way to batch everything so I can run the command on a folder with several MLV files in it.

Sunday, December 15, 2013

UPDATED: Converting Magic Lantern MLV files to RAW on OSX

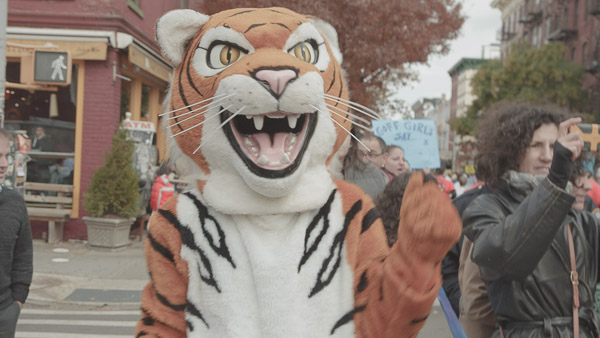
Enjoy this tiger at the 2013 New York Marathon from a video I'm cutting.
UDATE: Check out this solution for directly converting MLV to cDNG or DNG.

I've had some difficulty converting files from the latest Magic Lantern raw video format (MLV) into something that I can post-process (like DNG or cDNG files) on my Mac.

After working on it a month or so ago, I gave up and eventually installed windows via VMWare Fusion so that I could get mlv_dump working. I was successful in windows and was able to mass convert a bunch of footage into RAW files which was compatible with my workflow (currently using RAWMagic on OSX, etc.).

Well, somewhere a few weeks ago I deleted my VMWare Fusion partition and lost the notes I had on the windows box detailing how to do the conversion. I didn't want to go through the trouble of installing windows again so I gave another stab at converting MLV files on OSX… and I got it to work!

So I want to share my findings, both for my future self, as well as anyone else out there using the new format with OSX.

First off, download the pre-compiled binary that user marekk has generously posted on the Magic Lantern forum from his Dropbox: https://www.dropbox.com/s/497bvdlcsd7p160/mlv_dump.zip

I copied this file into the same directory as my MLV files and unzipped it.

Open a Terminal window and cd into the folder where you have your MLV files (and now mlv_dump).

Drag the (unzipped) mlv_dump file from Finder into the Terminal window and add the following text:

-o outputfilename.RAW -r mlvfilename.MLV


So now you should have something like the following in your Terminal window:

<path for your MLV files>/mlv_dump -o outputfilename.RAW -r mlvfilename.MLV


Of course, replace outputfilename.RAW with whatever name you want to call the RAW file to be generated. And replace mlvfilename.MLV with the name of the MLV file that your camera produced.

Once you hit Enter, it should start processing and you'll get a RAW file. Voila! Continue your workflow from there.

Hope this helps folks to ease the transition to using MLV.

If someone savvier than me with OSX can think of a method to batch process a bunch of MLV files into RAW, please let me know! Leave a comment below, thanks!

Saturday, September 14, 2013

Online dating profile photos for single women in New York

Earlier this year I put together a new concept where I merged my photography business with dating. For years I've casually given dating advice to my close female friends. I noticed over time that the ones that put my advice to use, pretty much always got the guy. I didn't think much of it, and I was happy to help. I just knew exactly what their date or beau was thinking and why he was acting the way he did. After a dozen years of dating in New York, I knew how the process worked, especially with online dating.

Now I use my experience as a commercial photographer to light and pose women, using the best tools and techniques available, to make advertisement-quality imagery. After all, dating is all about advertising yourself in the best manner possible.

This kind of photography is all about the right posing, so it doesn't matter if you use Match.com or OKCupid or jDate. The fact is that people are nervous when in front of the lens, so I like to coach them into the right expressions and body language.

After working with fashion models, I noticed that they use special expressions to make their faces look good on camera. If we made a silly post-work group photo, the girls would look really normal - like any photo you see on Facebook. But when they're working, they change their face in a particular way to achieve the "look."

When I asked them about it, they couldn't explain to me how they did it. They just would tell me that you need to practice. I asked Tyra Banks about it when we interviewed her for her iPhone app. She tries to explain it also, but can only describe it in the broadest of terms ("Smile with your eyes! Smize!").

Tyra Banks with my buddy Todd

So I decided I just needed to crack the code myself. I took careful note and eventually was able to explain and share their modeling secrets with my headshot and portrait clients.

Now my clients love my posing tricks, including one simple one anyone can use anytime. If you remember the things I coach you on, the result is that you'll never take a bad picture again. I also like to do a facial analysis and determine if you have an eye difference (most people do), and we figure out which side is your "good" side.

So, anyone can put someone in front of their camera and shoot a photo and call it good. And usually photographers that work with models can't articulate exactly what they want you to do, they just rely on the model to work her magic. If a shoot doesn't come out that well, they just grumble about the model and how they need a better one for next time.

Well, I don't believe that people are born photogenic or not. I think that anyone can work their own magic with the techniques I teach them. And if I can help some women in the competitive dating world in New York, I'll be very satisfied.

Friday, August 2, 2013

Compressing Magic Lantern RAW video Part II


I shot a candlelight test with the Mark 3 (finally got it back from service) and the Mark 2 and decided to test the file sizes again.

Mark 3 footage uncompressed: 100.22GB
Mark 3 footage lossless compressed: 55.82GB (44% reduction in size)
Mark 3 footage loss compressed: 22.63GB (77% reduction in size)

Mark 2 footage uncompressed: 47.15GB
Mark 2 footage lossless compressed: 29.56GB (37% reduction in size)
Mark 2 footage lossy compressed: 16.53GB (65% reduction in size)

Pretty significant savings, even with the lossless compression. Since I haven't finished editing this one, I think I'll keep the lossless compressed around until I finish. Then chuck it and keep just the lossy compressed files.

Above is a frame from the test. Lit purely by candlelight!

Wednesday, July 17, 2013

Compressing Canon 5D RAW Video to Save Space

I decided to compress my raw video footage to save hard drive space. It was always in the plan, but I've been too busy shooting for the past two weeks. So last night I finally had some time to try it.

I took a folder with about 32 minutes of footage (it was about 47,400 frames, at 24p that is about 32 minutes). At the varying resolutions I've been shooting the 5D Mark II at, finder told me that the folder size was 113GB. I fired up Adobe DNG Converter and told it to compress all of those DNG files using lossy compression, no embedded preview, no fast load data, etc. I believe my settings make for the tightest compression possible while preserving pixel count:


I let it run overnight and I compared the file size this morning. WOW, what a difference. The file size dropped from 113GB to less than 30GB. That's an over 70% reduction in size.

I know some guys will say not to use Lossy compression, but I would bet those fellows are probably amateurs or come from a stills photography background, or both. They will for sure say something like, "Hard drive space is cheap, keep the data!" But in reality hard drive space is not that cheap unless you buy the cheapest consumer drives and have room in your computer or a sufficient number of fast external ports for external drives.

In the world of moving pictures, the use of lossy DNG compression will not affect the end result at all. And a 73% reduction in storage requirement is significant.

Agree? Disagree? Let me know in the comments below!

Friday, July 12, 2013

Canon 5D High ISO RAW Video

I shot this for a client on Monday, using mostly ISO1600 and sometimes 3200 (the dog in sun was ISO100). The consequence was that I barely had to light it, and I could really run and gun, focusing my attention on content and pulling focus. Some of the footage has been pushed +1.0 to +1.6 stops of exposure in post (ACR) to match brightness levels from clip to clip. The post production cost is higher than shooting H264 though... I estimate for a short video like this, to add 1 to 1.5 days. With my workflow, that's the time to convert raw files to DNGs and adjust them, and also the time at the end to do color corrections and other raw adjustments and re-encode ProRes files.

The lesson learned here, for me, is that I can shoot at ISO1600 with impunity, and probably 3200 too. In post, I couldn't tell them apart. Can't wait to try with the 5D Mark III next to see if it's that much better. These are exciting times indeed. Arri Alexa eat your heart out!


Rare Breed Gourmet Dog Treats from John Ha on Vimeo.

Tuesday, July 2, 2013

Magic Lantern raw video test results on 5D Mark II


Lucy RAW test from John Ha on Vimeo.


I've been testing the Magic Lantern raw video capability on my 5D Mark 2 and 5D Mark 3 cameras. Well, I first tried loading it onto the Mark 3 and promptly bricked it. Oops, that's going back to Canon for repair.

So then I loaded it on my Mark 2 and it's been working fine. I installed the June 29th nightly build.

On the Mark 2 currently, here are my findings for shooting resolution (for 16:9 aspect ratio and 23.976 frame rate override, 180 degree shutter equivalent):

1880x1058 is the max resolution for the 5D2 and even with my Sandisk Extreme Pro 90MB/s card, I can only record for a limited time (maybe 1000 or 1500 frames).

At 1728x972, I can record continuously with my Extreme Pro 90MB/s card, but not with my Extreme 60MB/s card.

At 1600x900, I can get about 1500 frames out of the slower 60MB/s card. And of course continuous recording with the faster card.

At 1472x828, I can get continuous recording with the slower Sandisk Extreme 60MB/s card. I'm using the 64GB version and I estimate I can record about 22minutes of footage on that card.

At 1280x720, I estimate I can get about 28 minutes of footage on that slower 64GB card.

This is great news. I've seen tests comparing 720p raw vs 1080 H.264 and the 720p raw wins. So I think if you want to shoot raw on a job and don't want to buy or rent the faster 1000x cards (which are pretty expensive right now), this is a great compromise.

I am going to do a test of shooting the Mark 2 at 1472x828 and at 1280x720 and then uprezzing the files to 1080p.

Currently, the limiting factor of shooting these cameras using Magic Lantern raw at 1080p resolution is not the camera, but the acquisition media costs. The reliable 1000x 128GB cards go for $600-700, and you will need at least 2 or 3 for a job. At full resolution, you get about 25 minutes of footage per 128GB card. That is a pretty steep price. Of course you could rent the cards, and for a job that is probably a good idea.

But a good compromise at a lower production cost could be to shoot at 720p or 750p or 820p.

I will run some tests and post the results later. In the meantime I hope you enjoy the Lola and Lucy video above, shot in RAW on the 5D2.

Sunday, March 10, 2013

Most reliable hard drives for photography and video

What brand of hard drive do you think I'll never buy again?


All hard drives fail eventually. It's just a fact of life. But some fail more frequently than others.

I used to buy all Hitachi drives and they were great for a while, but then their reliability went down the tubes. I switched to Seagate drives and they were fine, but then one by one they died. I have 10 drives inside my Mac Pro, and I use two externals. I used to RAID everything, so when I bought a set of drives, I would buy a dozen or more so that I would have matching drives and spares. Of the 14 Seagate drives I bought during my Seagate phase, only 2 still work! Now that is unbelievable.

I've since switched to Western Digital drives and they have, knock on wood, been very reliable. I use 3TB Green and Red drives for bulk storage, SSDs for boot, and Velociraptors as supplemental fast storage to the SSDs.

Here's what I recommend:

For SSDs, Samsung 840 series: http://amzn.to/YUNmy5
For fast supplemental storage, 1TB Western Digital Velociraptors: http://amzn.to/Y4lSqp
For bulk storage, Western Digital 3TB RED drives: http://amzn.to/10zXsve

If there's demand for it, I can talk about my crazy 10-drive configuration in my Mac Pro tower in a separate post.

Sunday, February 3, 2013

Guide to Tethering your Canon 5D Mark II or Mark III

I recently wrote up some tethering instructions for the students in my studio photography class. I shoot tethered in the studio all the time, so for me it's second nature. But for my students, it can all be a little confusing, especially if you haven't tested all the different variations of software you need and know the limitations of each combination.

So I wrote up a cheat sheet for the most common setup we use in class. I thought I'd share it here in case it helps others.


Setup: For the Canon 5D Mark 2 or Mark 3 camera tethered to an Apple Mac OSX computer.  WITH live view shooting support. If you don't need live view support on the computer, then there is an easier setup (described below).

Description: There are two common ways to tether the 5D2 or 5D3, one way is a bit more complex but allows you to use Live View on the computer.  This method is useful for still life shooting because you can compose the scene and adjust the camera position while viewing on a large computer screen (instead of through the viewfinder or using the small screen on the back of the camera).

Concept: The general concept is to copy the files from the camera to the computer, viewing the photos immediately.  In this setup we use Canon's EOS Utility to do the copying, and Adobe Lightroom to do the viewing.

Required Software: Canon EOS Utility and a viewing program, like Adobe Lightroom. Canon EOS Utility is used to copy the files from the camera to the computer whilst one is shooting. It also allows the Live View functionality on the computer. Adobe Lightroom is necessary to view the images in an organized way. One thing about Lightroom is that your images need to be imported into the Lightroom "catalog" for viewing. I'll explain this further below.

Pre-Requisites: Lightroom needs to be installed and the Auto Import feature needs to be enabled.  The Auto Import feature "imports" images into the Lightroom "catalog" for viewing.  This feature basically keeps an eye on a single (empty) folder.  When it detects a new image in that folder, it will move it to a target folder that you specify.  On my computer, I have an empty folder called "To Autoimport" and another folder called "Autoimported."  I set Lightroom to watch the "To Autoimport" folder, and if any files show up, it will move them to the "Autoimported" folder and simultaneously import the files into the Lightroom catalog.

The idea here is to set the camera to immediately copy the files that are being shot to the "To Autoimport" folder. Then Lightroom sees the files and moves them into the current Lightroom catalog (the "Autoimported" folder) so that you can view them while you shoot.

Since we are using EOS Utility to do the real-time copying, we need to set that up to put the files from the camera into the "To Autoimport" folder. There is an option called "Destination Folder" in EOS Utility where you can specify the folder. Depending on the version of EOS Utility there are some other options you may want to set also, like the ability to save on the camera's card as well as the computer, and to sync the live view functionality between the camera and computer (so that when you press the live view button on the camera, the computer shows the live view display also).


Shooting with Live View: If you want to use Live View on the computer, switch to the EOS Utility software and (after you choose the "Camera settings/Remote shooting" option), click on the Live View button (in EOS Utility). If you have the software set to synchronize live view display with the camera, then you can also press the live view button the camera to enter live view mode on the computer. You may resize the screen to make the Live View image larger. (This is a benefit to using a Canon system, as the Nikon software Capture NX2 does not allow a large live view screen. Please fix this, Nikon!)


Shooting without Live View: Once you have the software set up correctly, when you are ready to shoot, run the EOS Utility program and choose the "Camera settings/Remote shooting" option to ready the software for shooting.  Then open Lightroom to the "Autoimported" folder.  As you shoot, the images should appear in Lightroom.

Alternative method to shoot without Live View: If you use a program like Lightroom, and you don't need live view on the computer at all, you can shoot directly into Lightroom (thus eliminating the need to use EOS Utility). Just initiate Lightroom for tethered capture, it should recognize your camera, then shoot away.


Troubleshooting:

1. In Live View, you see a black screen instead of your subject:  Ensure that, under Live View settings, the Exposure Simulation mode is OFF.

2. The camera won't fire, or the strobe won't fire:  Check that the Silent Shooting option is set to OFF.

3. EOS Utility won't work correctly:  EOS Utility has a lot of versions, you need to ensure that the version you have works with your camera.  For instance, older versions won't work with the new Canon 5D Mark 3.  Or some versions are buggy and will crash when used with the 5D Mark 3.

4. Lightroom won't display the images:  Updated versions of Lightroom 3 will process 5D Mark 2 files correctly, but you need an updated version of Lightroom 4 for 5D Mark 3 files.  Check that the Lightroom version is appropriate for your camera.


Other Variations for Tethered Capture:

There are many other combinations for tethered shooting. If you are working with a Nikon system and you want live view functionality on the computer, you will need to purchase a copy of Nikon's Capture NX2 software. This software is akin to Canon's EOS Utility.

Of course you can also shoot tethered in Capture One Pro. This is the preferred way (and as far as I know, the only way) of capturing if you make on-the-fly adjustments to your image and need the settings retained for the next capture (like crop settings, for instance). I have heard that the newest version of Capture One Pro (version 7) has live view support for some DSLRs. But I have not had a chance to work with it yet, so I'm not sure which cameras it supports. And I cannot seem to find a list of Live View supported cameras anywhere.

And of course if you shoot Hasselblad, you're likely shooting tethered into Phocus. Likewise Capture One Pro if you're shooting a Phase One or Leaf back, or you're shooting at high speed as with fashion or lifestyle photography.


Good luck! I hope this guide can help you sort out your tethered capture needs.

Monday, November 19, 2012

Nikon D600 now on sale under $2000

Wow, that was fast.  The Nikon D600 has been discounted to under $2000 street.  This is probably the best mulit-purpose DSLR on the market.  You can get it here: Nikon D600.


How to select the right focal length when shooting your mid-range zoom

So often I see people using their zoom lens to only change angle of view, with little to no consideration for depth of field, perspective and distortion.  I see them raise the camera to their eye, turn the zoom ring until their intended subject fills the frame to their liking, then shoot.  They are selecting their focal length based on field of view only (or how much you can take in, usually expressed in degrees, like 65 degrees horizontally).

But there are a couple other things to consider when selecting a focal length.  A wider lens increases depth of field and wide angle distortion.  So when you turn the zoom to go wide, you'll want to think about how that will affect your subject.  If you want to shoot a portrait, you'll usually not want to go wide as that can distort peoples' features and eliminate the nice soft blurriness of your background.

Let's take a typical kit zoom lens, like the Nikon 18-55mm or the Canon 18-55mm.

After shooting for a while with a zoom lens like this, you'll want to learn more about focal lengths.  Some people will think, hey maybe I should buy a prime lens and shoot with that for a while to learn more.  If that's you, then go ahead and buy the excellent Nikon 35mm f/1.8.  It's inexpensive, light, fast and ultra sharp.  In the Canon system, you can get the 35mm f2.  With one of these lenses, you'll learn just what shooting with a normal lens means.  Go shoot everything with it.  You'll learn that if you need to get closer to your subject, you'll have to use your feet to "zoom" in, and vice versa.

The benefit of a fixed focal length "prime" lens is you'll learn a great deal about that focal length.  You'll know how it responds to people subjects, landscape subjects, street photography, whatever you choose to shoot.  And importantly, you won't give into the crutch of turning that zoom dial to frame your subject.  You'll eventually know even before putting your camera to your eye whether you'll need to step back or step forward to get what you want in the frame.

You'll also benefit from a much faster lens (the prime will gather about 10x more light than your kit zoom).  You'll be able to shoot in much lower light conditions without flash, you'll be stunned when you first start shooting with a fast prime.

If you don't want to buy another lens, there is an easy way to simulate the effect of using a prime.  Get some duct tape or gaffers tape, set your lens to 35mm, and tape the zoom dial so it doesn't move.  Seriously, actually get your camera out and tape it and leave it this way for the next 3 months.  Resist the temptation to untape the zoom, as it will impede your learning.  You won't get the same shallow depth of field and low light shooting benefits as buying the prime, but you will get a taste of what shooting with a fixed focal length lens feels like.

After 3 months, switch the zoom position to 18mm and shoot everything there for 3 more months.  Eventually you'll learn what the different focal lengths will yield.

Below, I've summarized the different focal lengths for you.  If you choose the tape method of learning, I would recommend you go in this order:  35mm, then 18mm, then 55mm.  The equivalent lengths in full-frame are 50mm, 28mm and 85mm (or the classic lengths for "normal," "wide" and "portrait.")

At 18mm, the full-frame equivalent focal length is about 27mm.  This is considered wide angle, and is useful for creative wide angle effects and indoor photography due to the larger angle of view (about 65 degrees horizontally).  Wide angle is not traditionally used for portraits due to wide angle distortion (the sides and things closer to the camera get stretched).


At 24mm, the full-frame equivalent is about 35mm.  This is considered moderate wide angle or "normal."  The angle of view is about 54 degrees horizontally.  Neither wide or telephoto, this is a good focal length for street or documentary photography.  Great for interior social photography.  Not so good for capturing sports from the sidelines (not telephoto enough) or shooting architecture or landscapes (not wide enough).  The iPhone camera's angle of view is similar to this focal length.


At 35mm, the full-frame equivalent is about 50mm.  This is the classic "normal" lens for full frame film or digital photography.  The angle of view is about 39 degrees horizontally.  You'll see this length used a lot for a variety of styles including street photography, full length fashion photography or portraiture, still life and product shoots, etc.  It's a great focal length due to its relatively low distortion and very "normal" perspective which closely matches the perspective of the human eye.


At 55mm, the full-frame equivalent is about 85mm.  This is the classic "portrait" lens in full-frame.  The angle of view is about 23 degrees.  As the name implies, this focal length is used often for portraits and fashion.  The moderate telephoto length minimizes distortion and depth of field, which is flattering for people photography and yields nicely blurred backgrounds.


Monday, November 12, 2012

Definitive List of Recommended Autofocus Lenses for the D600

The Nikon D600 is the camera that probably 95% of those who bought the D800 should have bought in the first place.  It has superbly high resolution (more than any enthusiast or even professional is ever going to need) and is packed with almost every feature anyone needs.  You also partially avoid the high requirements of computer storage/memory/speed to support the huge files of the D800 (I say partially because the D600's files are darn big too).

Now that it's been released, I'm starting to get questions from people about lens choice.  I could point them to my list of recommended lenses for the D800E, but since a lot of these folks are enthusiast photographers and some are just stepping up to the FX (full-frame) format, I understand that they may not want to shell out for the best lenses.

So, I present my list of recommended lenses for the D600.  These are top performing lenses, but selected with an eye towards affordability and flexibility.  Therefore, I won't be listing some of the exotics, like the amazing 200mm f/2.  For those lenses, check out the recommendations for the D800E.  Again, I am highlighting autofocus lenses only.

The Best Normal Lenses:
  • If you want the absolute best and sharpest: Nikon 60mm f/2.8G Micro
  • If you want to save money, get the previous generation: Nikon 60mm f/2.8D AF Micro
  • I have a hard time recommending any of the AF 50mm lenses as they are really soft wide open, but if you must have one, I would get the Nikon 50mm f/1.8G and make sure you shoot it at its optimum apertures (meaning 4, 5.6, 8, or 11).
  • Don't bother with the Sigma 1.4.
The Best Mid-Range Zoom (if you must have a mid-range zoom):
  • The best, even for the D600, is still this one: Nikon 24-70mm f/2.8G
  • If you can't afford the 24-70, then this is a decent compromise.  Just be sure to shoot it at f/5.6 or f/8 for the sharpest photos.  Wide open, you will be disappointed: Nikon 24-85mm f/3.5-4.5G VR
  • I can't recommend the 24-120mm f/4G because you have to use it at optimum apertures for it to be decent; it's not really up to the standards of the D600 or the D800.
The Best Portrait Lens:
Again, don't bother with the heavier, less sharp, more expensive 85mm f1.4G unless you really want that extra 2/3 stop for some reason.
The Best Telephoto Lens (the same list as for the D800):
The Best Wide Angle Lens:
The Best Telephoto Zoom Lens:
  • If you've got the cash, you will never regret this: Nikon 70-200mm f/2.8G VR II
  • The budget option is this, if you don't need VR: Nikon 80-200mm f/2.8D
  • I'm tempted to list the new f/4 zoom, but I've always ended up needing f2.8, so you'll really have to know yourself as a photographer to make this decision: Nikon 70-200 f/4G
The Best Ultra-wide Angle Lenses:
This is more difficult as the venerable 14-24mm shows its corner deficiencies with the resolution of the D800.  This is where you'll want to compromise on the autofocus and go with the Zeiss 15mm when it starts shipping.
The Best Macro Lens:
Conclusion:
The lenses above should cover everything that 99% of general users of the D800E will encounter.  If you want to put together a zoom kit that covers everything, I would get the 24-70 and the 70-200 and be done with it (add the ultra wide if you need it).  If you want the utmost in image quality, go with the primes.

Definitive List of Recommended Autofocus Lenses for the D800E (and D800)

Everyone has been asking me what lenses they should get for their D800E (and D800).  Unlike in the medium format digital world, where most all of the lenses are superb, even when shot wide open, in the 35mm world you have to pick and choose your lenses very carefully to ensure that they will be good enough on the D800.

If you pick a lens that's just not up to standard of resolution on the D800E, you're needlessly wasting that 36 megapixel goodness.  (In that case, you may as well just shoot with a lower resolution camera like the D600 or even the D700.  Check out my recommended lenses for the D600.)

So I've decided to put this page together to help D800E and prospective D800E buyers select the very best lenses for their camera.  Now keep in mind that most lenses, if you know how to shoot them with exquisite technique, can give you great results, even on the D800.  But here I'm going to focus on lenses that you can shoot at most any aperture and get stellar results from.

Also, I've decided to limit the selection to autofocus lenses only.  If you're shooting still life or landscapes and don't need autofocus, that's just fine.  But for most people, one of the main reasons to get a DSLR is for their fast and accurate autofocus.  So I'll only be highlighting autofocus lenses.


The Best Normal Lenses:
  • If you want the absolute best and sharpest: Nikon 60mm f/2.8G Micro
  • If you want the sharpest but don't mind the previous generation to save a few bucks: Nikon 60mm f/2.8D AF Micro
  • I have a hard time recommending any of the AF 50mm lenses as they are really soft wide open.  Don't bother with the Sigma 1.4 either.
  • My secret weapon normal lens is this one: (coming soon, stay tuned)
The Best Mid-Range Zoom (if you must have a mid-range zoom):
  • If you must have the absolute best and sharpest, then there is no question:Nikon 24-70mm f/2.8G.
  • I'm reluctant to list this, but if you can't afford the 24-70, then this is the next best thing.  You'll need to shoot it at f/5.6 or f/8 for the sharpest photos though: Nikon 24-85mm f/3.5-4.5G VR
  • I can't recommend the 24-120 f/4, it's not really up to the standards of the D800.
The Best Portrait Lens:
You don't need the less sharp, much heavier and more expensive 85mm f1.4G unless you really want that extra 2/3 stop for some reason.
The Best Telephoto Lens (a few good choices here):
The Best Wide Angle Lens:
The Best Telephoto Zoom Lens:
The Best Ultra-wide Angle Lenses:
This is more difficult as the venerable 14-24mm shows its corner deficiencies with the resolution of the D800.  This is where you'll want to compromise on the autofocus and go with the Zeiss 15mm when it starts shipping.
The Best Macro Lens:
Conclusion:
The lenses above should cover everything that 99% of general users of the D800E will encounter.  If you want to put together a zoom kit that covers everything, I would get the 24-70 and the 70-200 and be done with it (add the ultra wide if you need it).  If you want the utmost in image quality, go with the primes.